What Is A Blower Motor?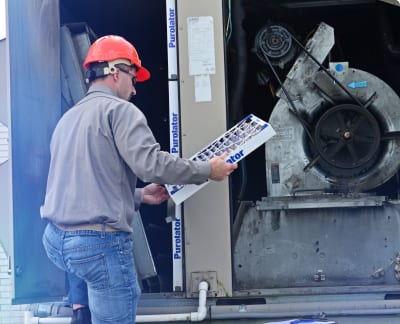
Before we tell you how to perform blower motor cleaning and maintenance it is important to understand what they are and how they work.
A blower motor is a component within an HVAC system that is responsible for circulating air into the building. It’s the key to maintaining a comfortable temperature and humidity throughout your facility. Blower motors push cold air (in the summer) or hot air (in the winter) through ducts to the desired locations. If your structure has air registers, you likely have multiple blowers in your HVAC system that need to be maintained.
How Does A Blower Motor Work?
There are two main types of blower motors: single-speed motors and high efficiency electronically communicated motors (ECM), also known as variable-speed motors. A single-speed blower is standard in many older furnaces and only runs on two speeds: ON at 100% or OFF at 0%. Just like a regular light switch, it only has on or off, with no settings in between.
A variable-speed blower on the other hand, runs continuously at a lower output and lower electrical usage. It can adjust speed and air volume to perfectly match the desired heating and cooling air needs of the facility. It is similar to the gas pedal of a car because it can adjust speed based on demand. These blowers constantly monitor data coming from the system and can make adjustments for dirty filters or blocked vents by increasing air speed.
What Are The Main Parts That Make Up A Blower Motor?
Now that we have an understanding of how a blower motor works, we can give an overview of its most common parts:
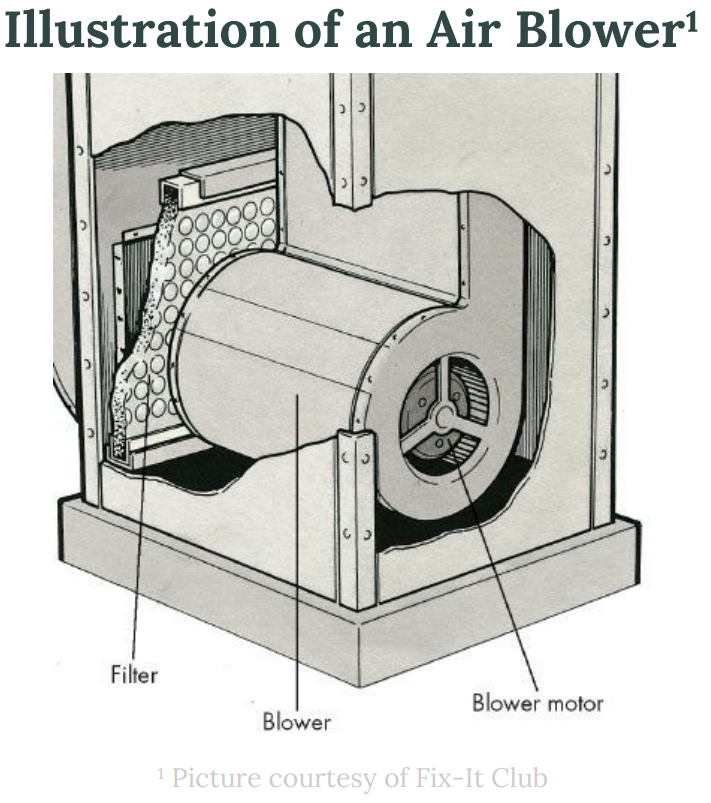 Motor – Power source and main component of the blower. It is responsible for driving the shaft. As the motor operates, the fan moves accordingly.
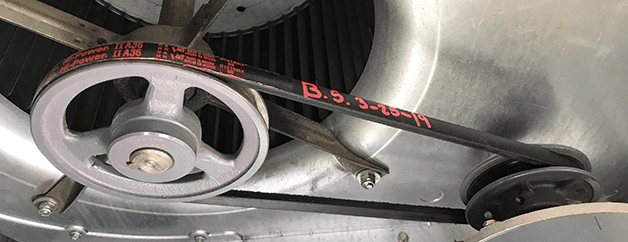
Belt – The motor shaft is connected to a belt and the belt is connected directly to the fan. As the motor operates and turns the shaft, the fan moves accordingly. Not all HVAC systems employ a belt to drive the fan. Some are direct drive, where the motor shaft directly spins the fan blades without a belt.
Shaft – The impeller is mounted on a shaft. This component uses torque from the motor to transfer energy to the impeller.
Housing – Without the housing, the blower becomes more prone to damage caused by dirt, grime, oil and moisture leaking into its wires.
Bearings – Bearings work to reduce friction between the rotating shaft and the motor to keep the impeller spinning in place.
Capacitor – Capacitors help the motor run and/or start, give the motor more starting torque and help the motor run more efficiently. Without torque to turn the blower wheel or fan belt, it won’t start.
The Importance of Blower Motor Cleaning and Maintenance
Routine blower motor cleaning and maintenance not only extends the life of equipment but reduces operating costs, downtime costs and troubleshooting costs. It helps mitigate the majority of these expenses because the issues are caught ahead of time.
Your Blower Motor Maintenance Program
Maintenance Programs for blowers can be grouped into three categories: routine, quarterly and annual maintenance. Routine Maintenance is the process of setting a schedule to inspect components that are considered to be a leading indicator of potential failure.
For blower motors, it is good practice to routinely monitor:
● Bearing and Lubricant Condition
○ Monitor and log bearing temperatures, lubricant level and vibration. Lubricant should be clear with no signs of bubbling. If bubbling is occurring, this is a good indication to add more lubricant to decrease the temperature of the bearings. If there is an increase in vibration in the bearings, this may be a good indicator of impending bearing failure.
● Shaft Seal Condition
○ Check the mechanical seals. There should be no signs of visible leakage.
○ During downtime, inspect the pump’s packing to make sure there is adequate lubrication. Then, if the packing looks compressed and dry, replace the packing and add lubricant per the operation manual.
● Replace Filters
○ This simple solution helps prevent nuisance issues and downtime related to dirty fan blades, motors, coils and heat exchangers.
● Air Flow
○ Ensure all return air registers are open a free of blockage. Lack of air flow will decrease a motor’s efficiency and cause nuisance shutdowns.
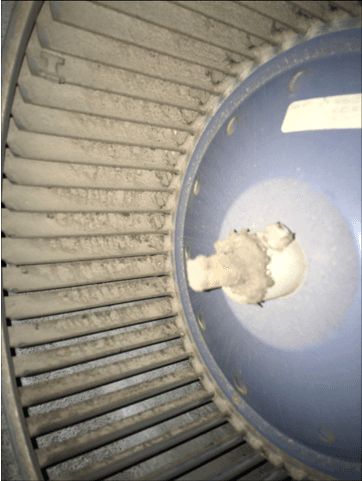
Dust build up on fan blades.
Quarterly Maintenance
Check fan blades for cracks, missing balance weights and vibrations
Then inspect for obvious signs of dirt and debris buildup on the fan and/or fan blades
Check and record/chart motor amp draw readings. This proves motor performance and proper belt tension. Charting results can alert you to a problem that may not be visually evident.
Then clean fan blades and motor of dust.
Dirty fan blades can cause a number of issues including premature motor failure and a 20% increase in motor operating costs. It can also cause nuisance shutdowns from lack of airflow, improper dehumidification in cooling mode, failed A/C compressors from loss of airflow and dirty coils and failed heat exchangers (which can lead to carbon monoxide poisoning).
Annual Maintenance
Keep an accurate record of the performance at least once a year. Perform annual insulation-resistance (IR) and other appropriate tests including a thorough visual inspection, as well as voltage and current checks. All values should be recorded and compared each year. The trend of the readings will indicate the condition of the motor
Bearings – Inspect surface temperature with a thermometer. Compare the temperature of hot bearings with temperatures of normally operating bearings. Then check oil rings and watch for excessive end play.
Rotor/Stator – Check air gap between the rotor and stator with feeler gauges.
Belt – Check belt tension; belts should have about 1 inch (2.54 cm) of play. Sheaves should be seated firmly with little to no play. Couplings should be tight and operate without excessive noise.
Brush/Commutator – Inspect brushes and commutators of motors for excessive wear, proper type, hardness, conductivity and fit.
Motor Mount – Check mounting bolts, steel base plates for possible warping and concrete base for cracking or spalling.
Motor Temperature Control – Restricted ventilation will cause a motor to operate at a higher than the desired temperature. Dirt, grime, oil, moisture, etc. can clog ventilation passages. Keep the motor clean and cool.
Bearing Housing – Inspect for signs of wear, corrosion, cracks or pits. Replace housings if worn or out of tolerance.
Bearing Frame and Foot – Inspect for cracks, roughness, rust or scale. Machined surfaces should be free of pitting or erosion.
Bearing Frame – Inspect all tapped connections for dirt. Then clean and chase threads as necessary. Remove all loose or foreign material. Next inspect lubrication passages to be sure that they are not blocked.
Shaft – Check the shaft for any evidence of corrosion or wear and straightness. Noting that the maximum total indicator reading (TIR) at the sleeve journal and coupling journal should not exceed 0.002 inches (ca. 51 µm).
Need Help?
Don’t feel comfortable performing your own blower motor cleaning and maintenance? Then call the pro’s at Rasmussen Mechanical Services at 1-800-237-3141, email sales@rasmech.com or chat with an agent. Our team is here to help!
