By adopting a regular plate heat exchanger service schedule, you ensure your system will remain efficient. To guarantee you’re getting the best out of your heat exchanger, follow these steps:
1. T****eardown: This includes valving your unit, draining fluids from the exchanger, and a number of other important steps.
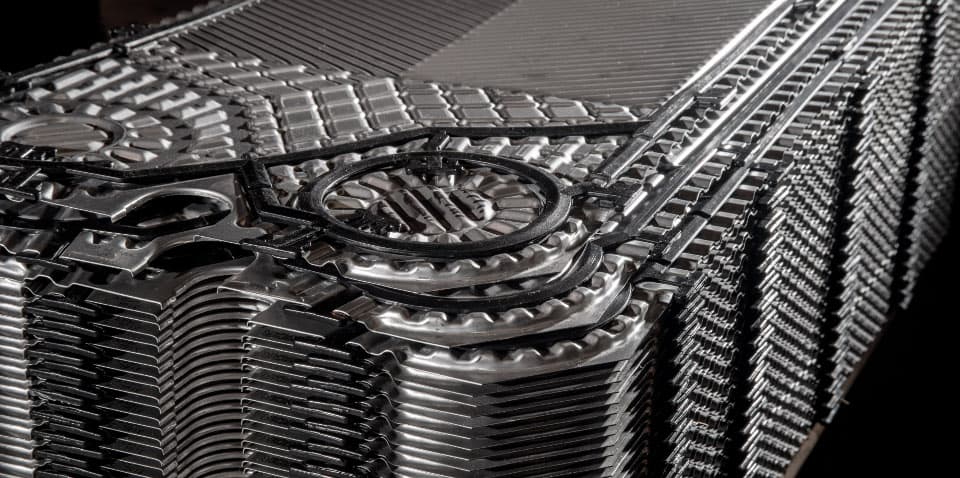
Plates found inside a heat exchanger with black gasket visible.
2. Cleaning: If possible, remove gaskets and clean the system’s plates.
3.Inspection and Reassembly: Reassemble the heat exchanger carefully to ensure maximum performance and reliability.
4.Verification: Verify that each unit is functioning properly.
Let’s dive deeper into each procedure to ensure you don’t miss a step.
1. Teardown
The first step in maintaining your heat exchangers is to disassemble your plate heat exchanger. This will require mechanical professionals to shut down and valve off all fluids to and from the heat exchanger. (Make certain that the lockout procedure is followed.)
In order to drain fluids from the heat exchanger, you will need to relieve all pressure by turning on the valve. You will want the unit to cool down before opening, but in order to do so, you will need to:
1. Loosen the heat exchanger’s bolts, approximately one-quarter inch at a time, before moving to the next.
To ensure the bolts are being loosened, work in an up and down pattern.
Keeping this in mind, try not to over loosen the bolts as damage can occur to the head.
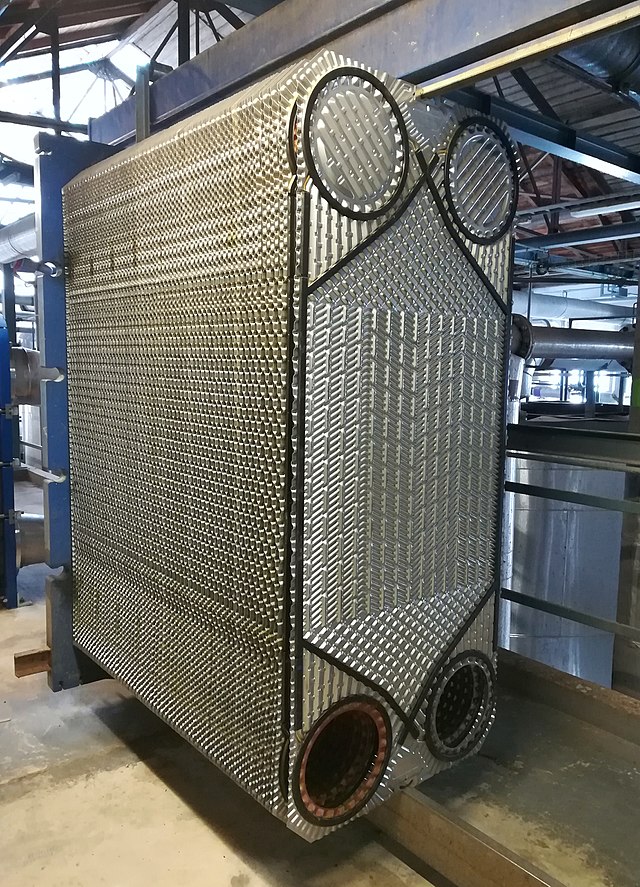
2. At this time, slide each moveable head back, finally exposing the heat plate pack.
3. To make reassembly easier, number all the plates in reverse order and display them at the top of each plate.
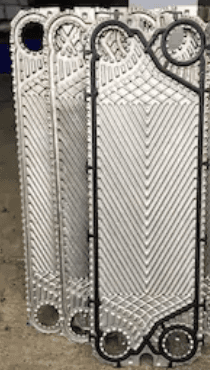
2. Heat Exchanger Plate Cleaning
Any good plate heat exchanger service plan includes cleaning. Follow the steps below to ensure you don’t miss a step.
1. First and foremost, remove the gaskets.
Gaskets can be reused depending on their current condition. To check if your gasket is still in prime condition, pinching it can reveal its state of condition.
If you are going to reuse your gaskets, wash them with soap and water, and hang them in a clean drying area.
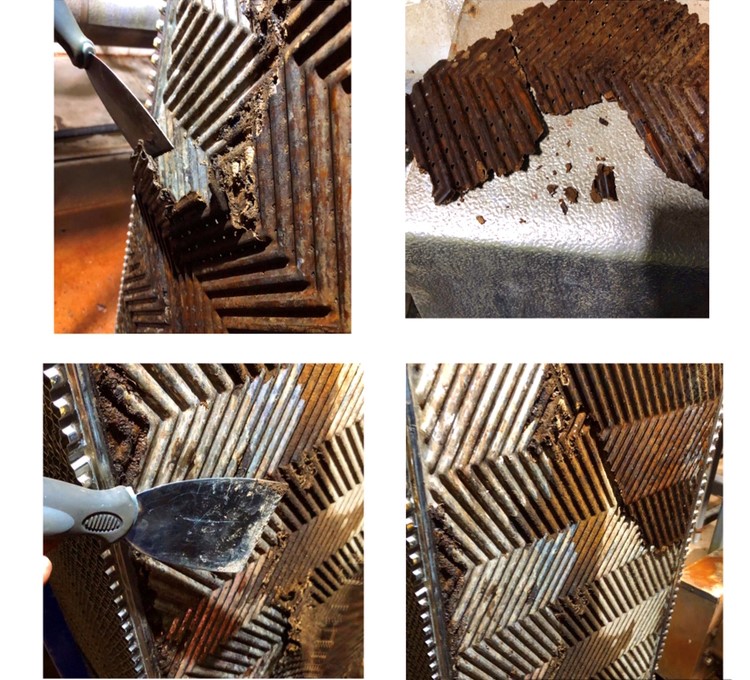
2. If there is loose debris on the plates, clean them with soap, water, and a soft bristle brush or a high-pressure washer.
In order to avoid damage, do not use abrasives or hard bristle brushes.
3. Wash the plates until all debris has been removed.
4. At the same time, pay very close attention to the gasket’s groove.
In certain severe cases, a hot acid and a caustic bath are used to break down stubborn adhesives and buildup.
Testing Heat Exchanger Plates
During this examination, it’s vital to test and inspect your plates for cracks and pinholes throughout your equipment.
1. First, visually inspect the heat exchanger for defects. Pay close attention to where the plates contact one another.
People generally use a light to aid in visual inspection.
In addition to that, it is also a good idea to perform a dye test to catch any pinholes missed in the visual inspection. If more than 10% of the plate pack contains defects, you’ll have to replace the plate. Failing to do so is detrimental to your unit. If your plates have passed the dye test, they can be washed off and put back into service.
3. Inspection and Reassembly
Before inspecting and preparing your heat exchanger plates, it’s essential to clean and prepare your plate frame prior to reassembly.
1. Begin by inspecting the nozzle area, paying special attention to weld zones and areas where corrosion and defects are possible.
2. Once inspected, check the fixed and moveable heads for straightness with a ruler. For painted or powder-coated carbon steel frames, look over the coating to see if it’s in satisfactory condition.
3. Next, check the top and bottom guide rail attachment points and guides.
4. Lastly, polish severe defects that can interfere with the plates.
Once this step is completed, start reinstalling the plates. Load plates directly into the frame. Look over the gasket to see if it is seated correctly. Finally, install the port rings into the frame.
4. Verification
Once your heat exchanger is assembled, it will be important to hydro-test your equipment and test and inspect it for leaks.
1. Flood the heat exchanger with water, either through the system or from another source.
2. Once flooded, let the water run for a while so it’s able to remove excess trapped air.
3. After that, slowly restrict the water outlet to raise the pressure. (Do not exceed the designed pressure during this step.)
4. Air dry the outside of the heat exchanger to get rid of any residual water.
5. Finally, while the heat exchanger is under pressure, inspect the plate pack for drips.
A few common causes of leaks are:
Debris in the gasket groove
Old gaskets
Defective gaskets
Hole in a plate
Need Plate Heat Exchanger Service Help?
Looking for additional help to maintain your heat exchanger unit? Call us at 1-800-237-3141, email sales@rasmech.com, chat with a support agent, or contact us online.