Each year around spring time, many boiler owners begin to think about shutting down their boilers for the summer. Boiler layup is done to extend the systems useful life. Planning a boiler shutdowns provides two major advantages.
1. It allows you to perform a detailed inspection of the system that would not be possible while the boiler is in use.
2. It helps to prevent corrosion and rust, which extends the boilers useful life.
To decide the correct type of boiler layup for your system, consider the boiler size and type. In this article we will cover two types of layup; dry layup and wet layup. Dry layups are intended for long term shutdowns, while wet layups are used when you may need quick access to a boiler. Choosing the correct layup method is an important decision and may require consultation with a boiler expert.
Time Frame Considerations
Our good friends at Miura Boilers do a great job of laying out the which type of layup you should consider below:
Short Term Boiler Layup Procedure
If you plan to shutdown your boiler for 5 to 10 days, you should perform the short-term layup. The short-term is a wet layup. It consists of leaving the boiler filled with concentrated, chemically treated boiler water; preferably with a pH of 12.4 (or as close as possible).
Semi-Short Term Boiler Layup Procedure
If you plan to shutdown your boiler from 10 to 30 days, you should perform the semi-short term layup. The semi-short term is a wet layup. It consists of draining the boiler of old boiler water and refilling with fresh feed water and chemical. Preferably with a pH of 12.4 (or as close as possible).
Long Term Boiler Layup Procedure
If you plan to have your boiler shutdown for more than 30 days, you should perform the long term layup. The long term is a dry layup. Start by draining all water contents within the boiler. After draining the boiler water, fil the boiler pressure vessel with nitrogen. Nitrogen is an inert gas that is used to avoid unwanted chemical reactions degrading the construction of the boiler. Once the oxygen content level decreases to 3%, continue to fill until the boiler is pressurized to 10 PSI. After the boiler is pressurized to 10 PSI, close all valves and remove nitrogen assembly.
The 7 Key Steps To A Successful Boiler Layup
(Note: Steps 1-4 are used for wet layup and dry layup. Step 5 is for a dry layup. Steps 6-7 are for a wet layup.)
1. (Wet and Dry Layup) Drain Your Boiler.
2. (Wet and Dry Layup) Open Fireside And Clean.
3. (Wet and Dry Layup) Open Waterside And Clean.
4. (Wet and Dry Layup) Examine Internal and External Components.
5. (Dry Layup) Close Up The Boiler.
6. (Wet Layup) Fill Boiler With Chemically Treated Water.
7. (Wet Layup) Circulate Water And Monitor.
1. Drain Your Boiler
To begin the boiler layup process, you will need to start by shutting your boiler down. Reduce the load and move the firing rate to the low position. Then, blowdown your boiler AND boiler level controls and columns. Any sediment or sludge that has collected at the bottom of the boiler should be removed before cooling and draining the unit. By doing this, the sludge won’t harden or allow for corrosion. Not to mention, a blowdown is much easier than cleaning with a shovel and bucket after the boiler is drained for the layup!
Next, consider a slow drain test of your level safety devices. You intend to shutdown and drain the boiler, so don’t waste the opportunity to ensure that your critical level safety devices work. A qualified boiler operator must be present during this process. This test closely simulates an actual boiler low water scenario by slowly dropping the water level until the low water safety cuts off fuel. The National Board of Boiler and Pressure Vessel Inspectors recommend a semi-annual slow drain test as part of their suggested boiler maintenance program.
Isolate The Boiler
Once the burner has tripped and the commercial boiler has stopped producing steam, isolate the boiler with manual shutoff valves. For a wet layup, you may wish to only isolate feedwater to prevent damage to the feedwater control valve. At a minimum, plan to isolate and lock the following:
Main Fuel
Pilot Fuel
Feedwater
Steam
Chemical Feed
Atomizing Steam (if applicable)
Soot Blower Steam (if applicable)
Prevent electrical power to blowers, igniters, and any other potentially hazardous energy source. Never trust a check valve to prevent backflow when your life is at stake. A double block and bleed arrangement or a blind flange in the system are preferred LOTO methods for life safety risks.
Fight The Urge
Fight the urge to cool the boiler quickly by opening the doors or running the combustion air blower. The best thing to do is to isolate the boiler and let it cool slowly on its own. This could take a couple of days, but slow cooling will prevent differential temperature stresses from damaging your boiler and the refractory inside it. “Pushing it” while cooling could be very costly! Be sure that at any given point, the reduction in temperature doesn’t exceed the manufacturer’s recommended rate. If your manual doesn’t note a rate, know that most manufacturers advise against a cooling rate faster than 100 degrees F per hour.
For steam boilers, after pressure has dropped to 10-25 PSIG, open the boiler vent to prevent pulling a vacuum on the boiler. (always refer to your manual)
Once the unit has dropped below 200 degrees, it’s ready to be drained. Draining does not have to be immediate. However, it should be soon after cooling to prevent corrosion or freezing if performing a boiler layup in the winter.

2. Open Fireside And Clean
Always open the fireside first when possible. This will make cleaning soot much easier because it will still be warm and wet. Begin cleaning and also inspect the fireside for any potential issues. If heavy scale and corrosion are present, it is recommended to use a chemical cleaner, like inhibited hydrochloric acid, to work away the buildup. If you find any problems while cleaning, mark them and have a boiler expert evaluate them.
Common issues to keep an eye out for include:
Blistering or pockmarks.
Heavy soot deposits
Leaking tube sheets
Gasket or seal leaks
Cracks in refractory
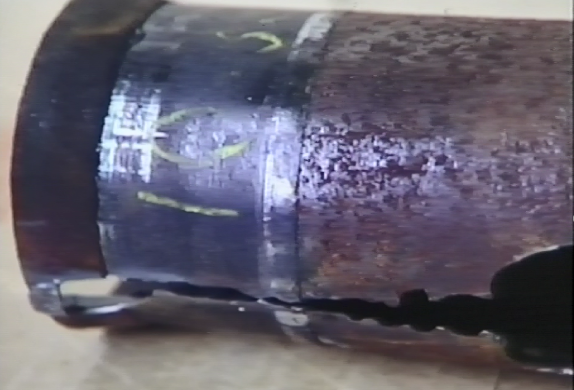
Oxygen Pitting
Biofouling
Following the cleaning and inspection it is now time to dry the fireside of the boiler. You can do this by using a fan or electric heater. Proper drying is important since any moisture left on the surfaces will cause the metal to corrode.
3. Open Waterside And Clean
Similar to what you completed on the Fireside; you will now want to do on the waterside. Look for the same issues listed in step two. Then wash away scale and sediment with particular attention to washout openings at the bottom of the boiler. Once complete, dry the waterside with a fan or electric heater.
4. Examine Internal And External Components
 The internal examination will likely need to be done by a certified boiler inspector. This is also a good time to look for signs of leaking and cracking. If problems are found you will then need to contact a certified mechanical contractor to perform the needed repairs. The National Board of Boiler and Pressure Vessel Inspectors recommends fireside surfaces be swabbed with neutral mineral oil at this stage. This is to help prevent further corrosion.
5. (Dry Layup Only) Close Up The Boiler
For dry layup you will want to place a moisture absorbing material on a tray in both the steam and mud drums. This will help reduce the moisture in the air which will prevent corrosion. Placing nitrogen, desiccant or VPCI (Vapor Phase Corrosion Inhibitor) inside prevent moisture and oxygen from corroding the boiler internals. Silica gel and quicklime are two common moisture absorbing materials commonly used.
You will generally remove the desiccant before filling the boiler for operations. Some VPCI products are water-soluble, allowing a plant to fill and run, without opening the boiler to remove preservatives. Consult your water treatment company for recommendations.
It is important to cover the boiler stack to prevent moisture build up during this stage as well. Be sure to inspect the boiler every 3 months (or more frequently depending on humidity) for active corrosion.
6. (Wet Layup Only) Fill Boiler With Chemically Treated Water
This involves filling the boiler with demineralized water and treating the water with oxygen scavengers to prevent corrosion. Water entering the boiler at this stage should generally be around 180º Fahrenheit. It is generally recommended that you contact a water treatment professional during this stage.
7. (Wet Layup Only) Circulate Water And Monitor
Fire the boilers twice per month to raise the water temperature which will help circulate the water. Alternatively, you can install a small pump to the bottom connection on the mud drum. This pump can then move water to the steam drum to turn over the water. In either case you should be testing the water at least once a week to ensure proper chemical treatment. Do not store boilers in this stage for more than 6 months. Perform a dry layup of storage is longer than that time frame.
Have Boiler Layup Questions?
As we mentioned at the start of this article, boiler lay-up procedure can vary based on boiler size and type. To make sure you are following the correct boiler lay-up procedure, get a hold of the experts at Rasmussen Mechanical. Give us a call at 1-800-237-3121 or drop us a line. We can walk you through which boiler layup procedure is right for you.